| The Greatest Fear: Step #3 – Practice Your Message |
“Practice DOES make perfect!” — By practicing your presentation, you don’t have to waste energy on worrying over things that may be forgotten. Follow the tips, be confident and RELAX.
Tip #1 – Review your slides
After the slides have been finished (Step #2) review them once again for continuity. Make sure that their progression brings the audience point by point to the final conclusion; the truth you want the audience to take away with them.
Next, go through your slides one at a time and create corresponding index cards that include the information to be conveyed to the audience about each slide and related bullets.
Tip #2 – Perform the 1st run-through
 Now you are ready to perform the first run-through of your “slide show” using the index cards for reference as you go. If your run-through takes 50% longer than the time allotted for your presentation, then you’re doing fine. When you know your subject matter, you will no longer have to use the cards. Your thoughts and statements will efficiently follow each other and your presentation will meet the allotted time.
If your run-through takes more than 50% longer than the time allotted, then you should consider what facts can be taken out of the slide show without detracting from the continuity of the presentation. Whatever is removed can be used as information for a backup slide for Q & A.
Tip #3 – Reduce the cards to one sheet
After a few run-throughs you should be able to reduce the information on the cards to one 8.5 X 11 inch “cheat sheet” containing one line per slide. These one-liners should be a list made up of several key words or phrases corresponding to every bullet on each slide.
With practice you should graduate to using the bullets as spring boards to the bits of information that are being presented, leaving the “cheat sheet” behind.
Tip #4 – Beat the “Fear of Forgetting”
Don’t memorize every word of your talk. Deliver the presentation without reading from index cards. When you memorize a presentation your delivery becomes stiff and artificial.
For the speaker, memorization conjures up negative memories of school experiences involving recitations and the terror produced is why many of us are petrified of public speaking. Learning your presentation is much different than memorizing it. Memorization links words, learning links ideas.
What you want to communicate is the essence of your slides, not the recital of every one of your bullets. It’s the meaning of your slides that you want your audience to retain and your bullets are the conduits to convey that meaning.
With bullets and sufficient practice, you don’t need to memorize. If you lose your train of thought, casually pause and look back at your slides and your bullets will trigger what needs to be said.
BTW: It’s OK if you don’t remember every point that’s been written down on your index cards. You’re the only person in the room who knows what pieces of information are contained in your talk and most people remember only 50% of what you will say, so don’t sweat the small stuff.
Additionally, there are words that my brain doesn’t retrieve and repeated attempts at retrieval leave me feeling blank and helpless to express myself. When preparing a talk, a few of “those words” surface and I fixate on them, imagining the problems they could cause me during my presentation. To combat the fear of forgetting, I’ve come up with a solution. Writing “those words” on a small piece of paper and placing the paper on the podium for quick reference seems to dispel all fear of forgetting, and allows the words and ideas to freely flow from my mind.
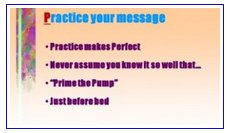
Tip #4 – Practice makes perfect
You should give yourself enough time the day before your talk, to do several run-throughs. When giving a slide show timing is everything. You need to move effortlessly from one slide to another. Practice counters the nervous tendency to follow rivulets of new thought during a presentation. Side trips off the planned track result in short-changing the number of slides that you can cover within your time limit. Fast forwarding through the left over slides to ensure that the audience sees the important remaining points flash before their eyes isn’t a good way to end your presentation.
And never assume that you know the subject so well or the presentation is so trivial that you can use old slides or quickly make up a few, and not practice what you are going to present.
When you want to commit something to memory for easy retrieval the next day, go over the information before bed, and sleep on it. Sleep straightens out the wrinkles in your thought process and cements ideas into your brain. So do one complete pass through the presentation the night before your talk.
Lastly, it’s a good idea to do one quick run through when you get up in the morning to clear the cobwebs of self-doubt and fear from your mind.
Tip #5 – Prime the Pump
When you recite the first few minutes of your presentation, the rest of your words flow smoothly without effort like water from a primed pump.
People acquire first impressions in the first minute or so of conversation; so too with the audience and the speaker. Know the first two or three minutes of you presentation well and you will establish yourself as a knowledgeable, confident professional. Once you are relaxed you will be pleasantly surprised how easily your prepared thoughts and ideas will flow through the flash of each slide that is subsequently displayed.
And learning your closing statement by heart enables you to end the presentation with the impact that you had wanted and leaves a satisfying feeling of completion for everyone attending, signaling the place for the audience to deliver your well deserved applause.
In summary: you have practiced your presentation so that it flows very nicely. You have committed to memory the first few minutes and the last summary statement of your talk so you can begin and end your presentation with pizzazz. And you’ve slept on the whole shebang. Now you’re ready to go.
Onward and upward to Step #4 – Project your personal image
Tags: business, business cards, elevator speech, empowerment, empowering women, handshake, networking, networking skills, presentation skills, self improvement, Susan Brauer, visualization, women's networking, Organize data, Prepare material, Practice your message, Project your personal image, Face your Fears | Category: Her Paradigm Shift, empowerment, self, women